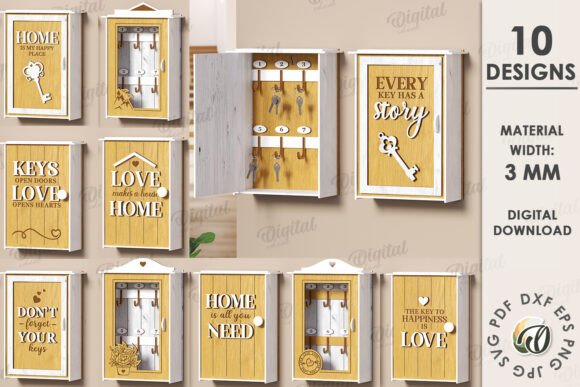
3D Camera Photo Boxes Laser Cut Bundle
In the world of digital crafting, few projects combine nostalgia with modern precision quite like the 3D Camera Photo Boxes Laser Cut Bundle. This collection of CNC files offers more than just a template; it provides a structured framework for creating tangible memories. Whether you are a small business owner looking to expand your product line or a hobbyist seeking a meaningful gift, these layered photo camera boxes bridge the gap between digital design and physical emotion. The bundle is specifically engineered for laser cutting machines, ensuring that every cut and engrave aligns perfectly to create a stunning pop-up effect.
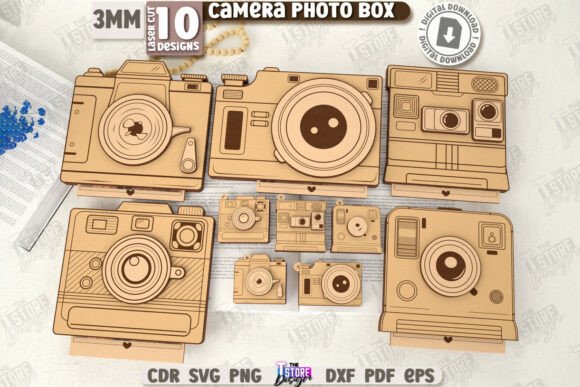
The Mechanics of Precision: Understanding the Files
Before diving into creative applications, it is essential to understand the technical foundation of this project. The success of any laser-cut craft relies heavily on file compatibility and machine settings. This digital product arrives as a comprehensive zip archive containing ten variations in multiple formats: SVG, EPS, PNG, PDF, and DXF. Each format serves a specific purpose depending on your workflow and software preferences.
For those using standard vector editing software, the SVG and EPS files offer scalability without loss of quality. However, users working with Lightburn should exercise caution. It is a known issue that Lightburn can sometimes distort dimensions when importing SVG files, leading to misaligned layers or incorrect fitment. To maintain structural integrity, we strongly suggest utilizing the DXF file format within Lightburn. This ensures that the 3D Camera Photo Boxes assemble correctly, preserving the intricate details of the camera lens, shutter, and body.
The design logic follows a clear color-coding system to streamline the cutting process:
- Red lines indicate CUT paths: These are the outer boundaries and internal shapes that need to be fully separated from the material.
- Black lines indicate ENGRAVE paths: These lines add texture, depth, and detail to the surface, such as the texturing on a camera grip or the markings on a lens.
By adhering to these guidelines, creators can avoid common pitfalls like warped wood or misaligned photo slots, resulting in a professional-grade finish.
Creative Applications Beyond the Standard Gift
While the primary use case for these camera-shaped boxes is often a birthday gift, the versatility of the design allows for much broader application. The concept of a "layered photo camera" taps into the universal love for photography and memory keeping. For educators, these boxes can serve as interactive teaching tools. Imagine a history class where students place photos of significant events inside the box, turning a simple craft into a tactile timeline of photographic history.
Marketers and bloggers can also leverage this design for promotional content. A custom-branded version of the 3D Camera Photo Boxes can act as a unique giveaway item at photography workshops or tech expos. Instead of a generic pen or notebook, recipients receive a functional storage solution that celebrates their passion. The decorative nature of the box means it doubles as desk art, keeping the brand visible long after the event concludes.
For freelancers and designers, these boxes represent an opportunity to explore mixed media. You are not limited to paper or cardstock. Experimenting with different materials—such as birch plywood, acrylic, or even leather—can drastically alter the aesthetic. A wooden version might appeal to vintage enthusiasts, while an acrylic version could attract a modern, minimalist audience. The key is to match the material choice with the intended emotional response of the recipient.
Tailoring the Design for Specific Audiences
One of the greatest strengths of the 3D Camera Photo Boxes Laser Cut Bundle is its adaptability. Different audiences require different approaches to customization. When designing for adults aged 20–50, particularly entrepreneurs and creatives, the focus should be on functionality and elegance. These individuals appreciate gifts that serve a purpose. Therefore, ensuring the photo storage capacity is sufficient and the assembly is seamless is crucial.
Consider the context of the gift. For a wedding anniversary, the interior could be engraved with coordinates of where the couple met, or the date of their first photo together. For a graduation gift to a journalism student, the exterior might feature motivational quotes about capturing the truth. The black engrave lines provide the perfect canvas for these personalized touches without compromising the structural design.
Small business owners should also consider batch production. By mastering the cut settings on one variation, you can efficiently produce dozens of units for holiday sales. Consistency is key here. If you plan to sell these as finished products, every box must open smoothly and hold photos securely. Testing your settings on scrap material before committing to expensive stock is a non-negotiable step in maintaining quality control.
Practical Tips for Assembly and Presentation
The transition from flat files to a 3D object requires attention to detail. Once the pieces are cut and engraved, the assembly process brings the design to life. Because these are layered boxes, the order of stacking matters. Start with the base layer, ensuring all tabs are aligned correctly. Use a low-tack adhesive or glue dots rather than liquid glue, which can warp thin materials or leave messy residue.
To enhance the presentation, consider the packaging. Since the box itself is a gift idea, wrapping it in plain paper defeats the purpose. Instead, present it in a clear sleeve or a complementary envelope that hints at the shape inside. This adds an element of surprise and elevates the perceived value of the product.
Furthermore, organizing your workspace is vital for efficiency. With ten different file variations included in the bundle, keep your digital assets organized by naming conventions. Separate your cut files from your engrave files if your software requires manual separation. This organizational habit saves time and reduces errors during the production phase.
Maximizing Value Through Customization
The true potential of the 3D Camera Photo Boxes Laser Cut Bundle lies in how far you push the customization. Do not feel confined to the default design. Use the provided SVG or DXF files as a starting point to modify dimensions, add personal logos, or change the camera model style. Perhaps you want a retro film camera look versus a sleek DSLR. The vector nature of the files allows for these modifications without losing resolution.
For those focused on SEO and online visibility, documenting your process can be beneficial. Creating tutorials on how to use the DXF files in Lightburn, or showcasing the final assembled boxes in a blog post, can drive traffic to your portfolio or shop. Share realistic examples of the boxes filled with actual photos to show scale and utility. This approach builds trust with your audience, demonstrating that you understand both the technical and creative sides of the craft.
Ultimately, this bundle is more than a set of files; it is a toolkit for storytelling. In an increasingly digital age, the ability to create physical objects that hold sentimental value is a powerful skill. Whether you are making one box for a loved one or hundreds for a business venture, the principles remain the same: precision in cutting, creativity in design, and care in assembly. By following these practical guidelines, you ensure that every 3D Camera Photo Box you create is not just a container, but a cherished keepsake.